|
Please, do not read this document if you
use ATS Desktop Client on a stand alone PC. Also, you do not need to
read this paper if you plain to use ATS Desktop with Active Directory
Services.
-
Uninstall FIRST your current ATS Desktop
using the Windows
Control Panel.
-
Windows 2000/XP/2003: you need Administrator privileges
to
install this software.
-
This current version will work only in Windows 2000, XP and 2003. If you
install it on top of Terminal Services, you must have Windows Terminal
Services correctly installed with all users created.
-
Important: if you
already have the ATS Desktop Client for Terminal Services, and you
wish to install a new version, after the install process, you will
not get the users list that you have. So, you must re-install the
users.-
1) Enter the Windows Terminal Server as
Administrator user 2) Run ATS Desktop Client
from the Windows menu "Start"->"Programs "->"ATS
Desktop 4" ->ATS Desktop 4
3) You will have the following
menu activated. 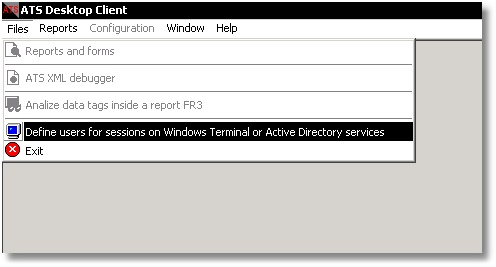
 :
This will allow them to define the users that will be using the ATS Desktop. :
This will allow them to define the users that will be using the ATS Desktop.
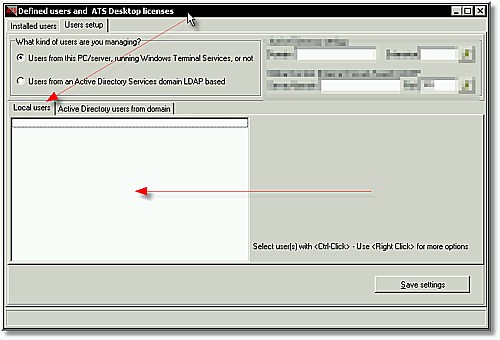
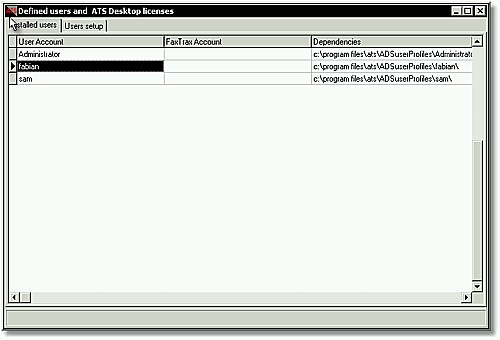
4) When selecting the above option the following screen will display

The above fields-columns contains the following information:
User Account (This field cannot be modified - it is only added by
clicking on 'Users setup' tab.
FasTrax Account (This field can be updated and is for reference only - A way to identify the login used in the Linux server and
should be equal to the user logged on the the Windows Terminal Server).
Dependencies This field contains the folder location for the specified user - This field is important because it must
correspond with the Desktop Folder in the User Setup within FasTrax.
5)
Add some users to ATS Desktop Client from this Windows Terminal
Services, by clicking on the "Users setup" tab. You
will see this screen.
6) At this point, just move your mouse to the white square when the second arrow is pointing and just do a <Right Click> with your
mouse. You will see this contextual menu
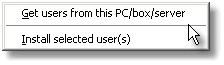
7) Click on the "Get users from this PC/box/server"
option.
All users defined for this Windows, WinNT users or Windows Terminal
users, will appear like this on that white square
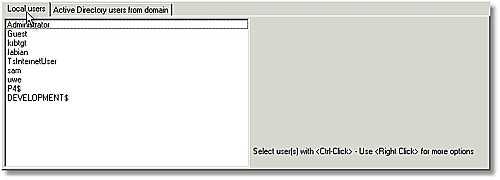
Note that some users may be not "user accounts" but
"internal Windows accounts". Some users with the "$"
sign are volumes, disks or just PCs. Using the clasical Windows approach
with lists, use <Ctrl-Click> on the users you wish to install,
until you be happy with the results. For example:
 At
this example we clicked on some users. A "hint" ( a tiny box
with a legend ) normally appear to guide you about the options. At
this example we clicked on some users. A "hint" ( a tiny box
with a legend ) normally appear to guide you about the options.
IMPORTANT: you will have by default only 3 (three) users licence.
This means, if you select more than 3 users, the system will only
install 3 users. Contact ATS Tech Support i fyou need more users
licences. Allways select the
Administrator user itself, first.
8) When you have the users you wish to install, you must <Right
click>, choice the "Install selected user(s)" option
9) The system will install the users you choose. At the status bar below
this windows you will be informed about the progression. You will be
informed about the sucess or about the problems with this process.
At the end, click on the  button. button.
10) We check our installed users clicking on the "Installed
users" tab. You must see something like this.
Important:
* Try to manage the same users name on FasTrax as in the Windows Terminal
Server.
* Once those users are created, please take some time to write on
"FasTrax Account" column the user name that all those Windows
users are using to getting FasTrax access. It will help you for
documentation and the
following step.
11) Indicating to the FasTrax users the dependencies from Windows
Terminal Server users. This is a very important step.
On FasTrax, under the System Administration -> Menu Security Control -> Add/Update/Delete Users you'll enter the users name you want to update then go to the (A)dd Info screen
and update field 3.
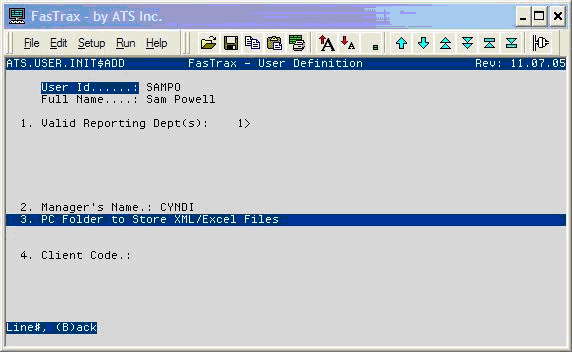
This has to match the exact same as it is defined in the fields Dependencies for that user.

This can easily be accomplished by highlighting the "Dependencies" column for that user and
pressing <Enter>, then <Ctrl-C> (copy), then going to FasTrax
and doing
<Ctrl-V > (Paste). This must be done for each and every
user: this is how FasTrax knows that where to place the XML's and Excel
documents for that specified user.
|